

HeatAlgo's underfloor-heating module turns a floor plan into a ready underfloor-heating loop layout with full hydraulics and pipe-length totals. You draw sections on a calibrated plan, the app works out pipe length and flow rate for every loop, and you can check the result against a room's heat demand straight from your OZC heat-loss calculation. Here's the whole workflow, step by step.
1. Upload the floor plan
Drag a PDF, PNG or JPG of the relevant floor onto the canvas. If you upload a multi-page PDF, HeatAlgo asks you to pick the page with the actual floor plan before you continue.
2. Calibrate the scale
Before you can draw anything useful, the plan needs a scale. Pick the calibration tool (shortcut C), click two points on the plan whose real distance you know - a door opening works well - and type that distance in meters. From that point on, every shape you draw on the canvas carries a real dimension; skip this step and the app won't let you calculate loops at all.
3. Align the grid to the walls
The grid (shortcut G) snaps your points to even spacing, but a floor plan rarely starts exactly on a grid node. Hold Alt (⌥ Option on a Mac) and click a room corner - the grid shifts so its lines sit right on the walls, and from then on you draw perfectly along them. Undo it with "Reset reference point" in the menu next to the grid icon.
4. Set the loop's design parameters
Set the parameters before you draw the first section - the pipes then lay themselves out at the right spacing straight away, with nothing to redo afterwards. In the parameters panel, enter supply and return temperature (35/30°C is a common starting point), the resulting ΔT, pipe spacing (typically 100, 150 or 200 mm) and the pipe type. HeatAlgo uses these to calculate every loop's length and flow rate. Change them any time - the pipes recalculate themselves.
5. Draw the heating sections
Use the Section tool (shortcut P) to outline every heated room or zone as a polygon. Each section becomes its own heating loop and the pipes lay themselves out inside it - if a room is large or an awkward shape, you can split it into a couple of smaller sections right at this stage instead of fixing it later.
6. Assign sections to their OZC rooms
Link each section to the matching room in this project's heat-loss (OZC) results. HeatAlgo immediately shows whether the loop's delivered output covers that room's heat demand, or whether there's a surplus or a shortfall - no manually copying numbers between modules.
7. Place the manifolds
Use the Manifold tool (shortcut M) to drop a distribution point exactly where it will sit on site - usually a utility cupboard or a hallway close to the rooms it serves. A larger project can have several manifolds, each covering a different part of the building.
8. Route the supply lines
Use the Route tool (shortcut R) to draw the supply run from a manifold to each of its sections - the loop and pipes render automatically from the parameters you set earlier. If you want full manual control over the pipe run instead, draw pipes directly with the Pipe tool (shortcut O).
9. Check the balance and warnings
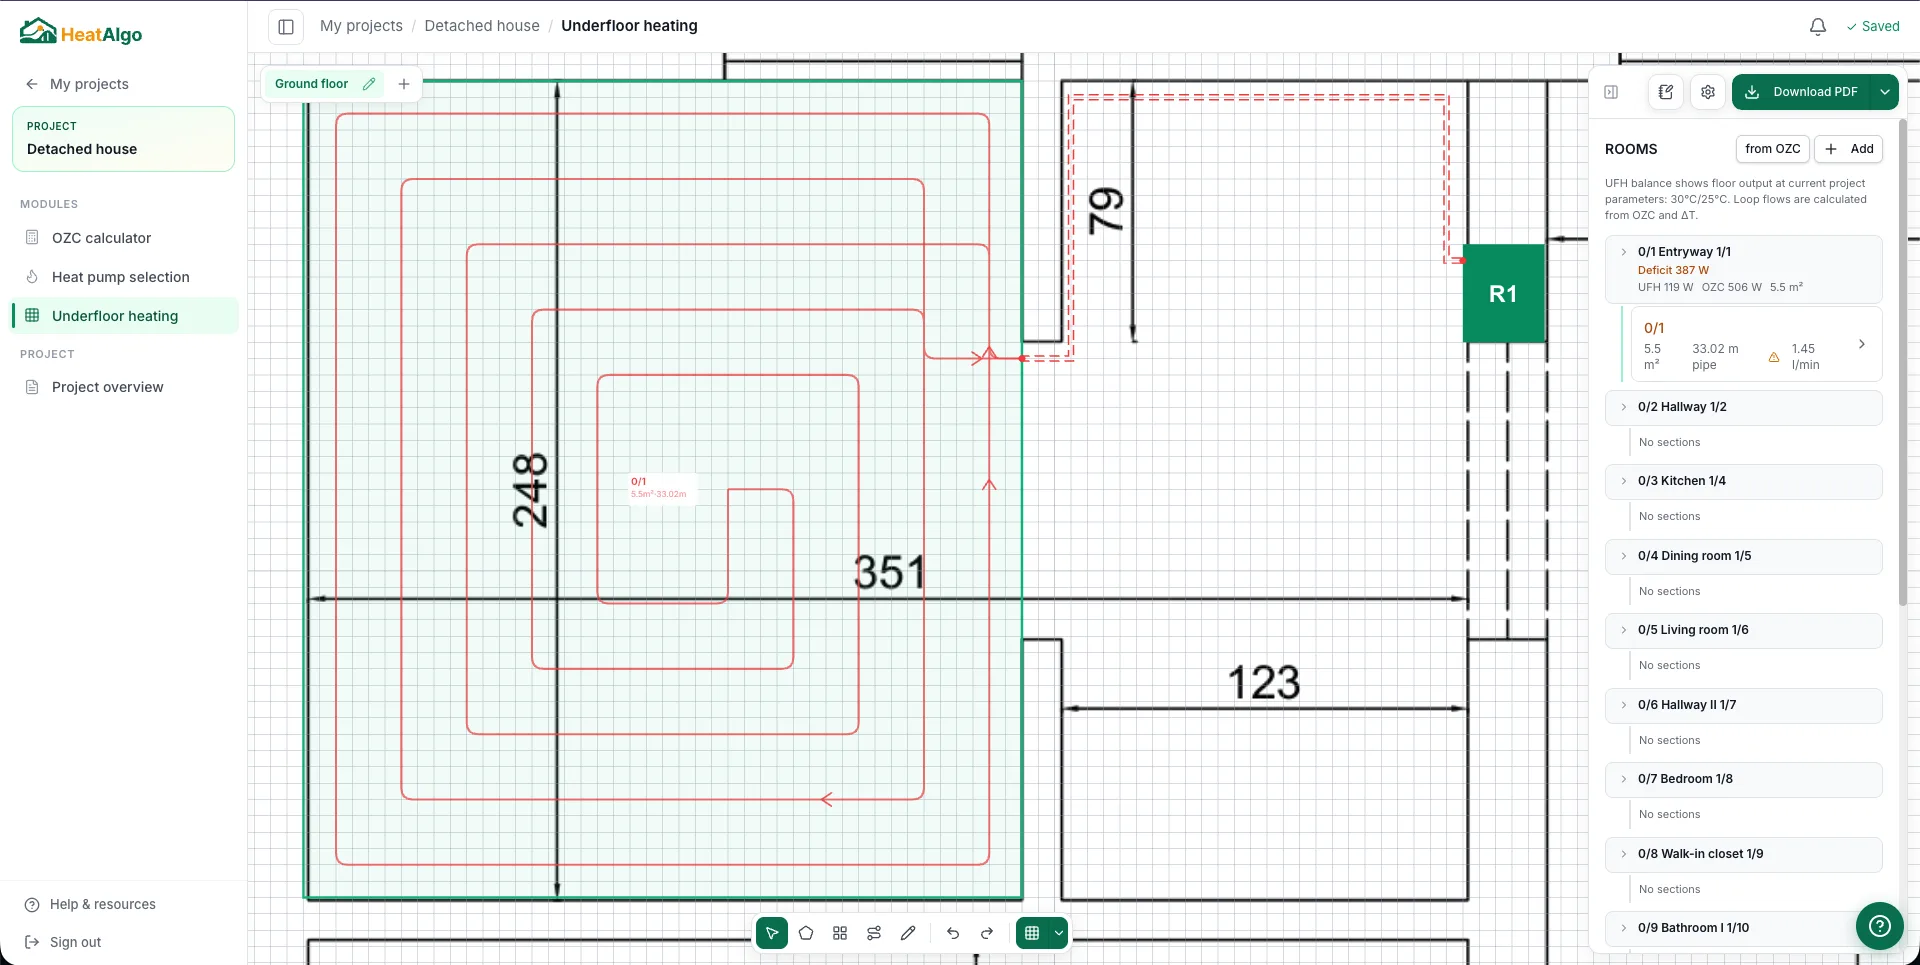
The side panel keeps every section's numbers in one place: area, pipe length and flow rate in l/min. Once a loop runs past the recommended or maximum length, the panel flags it and suggests splitting the section in two - before that turns into a problem on site.
10. Add more floors
A whole-building layout is just several floors living in the same project - add each additional storey as its own tab and repeat sections, manifold and supply routes independently for each one.
11. Export the finished project
Download a PDF report listing every section, pipe run and manifold, or the annotated floor plan itself - ready to hand to the install crew or the client.
Handy keyboard shortcuts
The canvas is faster with the keyboard: V select, C calibrate, P section (polygon), M manifold, R route, O pipe. Right-click opens a context menu for whatever's selected, and G toggles the grid (Alt + click, ⌥ + click on a Mac, aligns it to the walls). Collapse the side panel any time to claim back canvas space on a large plan. The full cheat sheet lives in the app, under the "?" button.
That's the whole workflow
Eleven steps from an uploaded floor plan to a finished underfloor-heating layout - hydraulics calculated automatically and checked against your OZC results. More guides live in the help center, and if you collect input data from clients, see how to send the client form. Found a bug, or missing something? Get in touch below.
Try free for 14 days